This is just a quick update on my plants. The herb garden is still doing great. The Basil is almost 2" tall, the chives are over 2" tall, and the parsley is starting to thicken up and look like a little bush of sprouts. I have had to start watering once a day now since the plants are getting big enough to drink more.
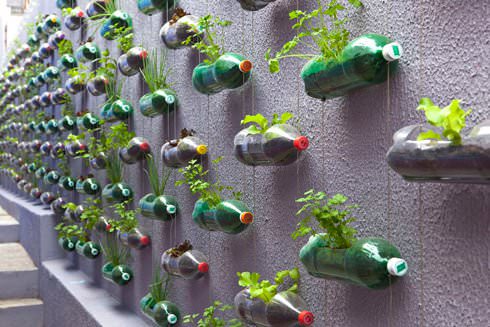
My planters are coming along nice. I have an ample supply of 2-liters already washed and cut, now I just need to find the time to string them together. I have been getting old bras from family members to make more planters with and thankfully the rest of my family is a little better endowed so I should have some in sizes big enough to grow more than just herbs.
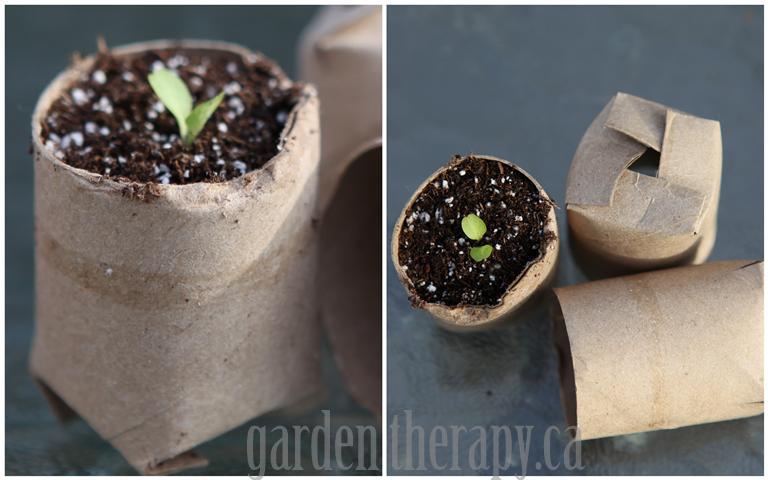
I still need to make time in my schedule to get a bag of soil and seeds. I will need to do that in a week or so to ensure I can transplant my herbs on time. Plants that don't get moved to a bigger pot become root bound and won't grow well. Sometimes this is used as a tool to keep a plant at a size that the grower likes such as a Bonsai Tree. I will be trying to avoid root bound plants though since I want to maximize my yield.
The nice thing about gardening is that you can take your time. Nothing grows overnight so there's rarely a need to panic. As long as I check on my garden everyday it will give me plenty of warning when it needs something.
Thursday, May 31, 2012
Saturday, May 26, 2012
Vermiculture: Preperations

 |
| From one of my favorite blogs: Electric Tree House |
Once I was sure my worm drawers were clean I started making holes for ventilation. Airflow is key to keeping the worms alive and the food from rotting (which causes odors). I prepared the bins in a manner that will encourage downward migration. For this I used a small rotary tool (though a larger drill would have been nice) and cut 2 long 1/2 inch wide slots and 4 small 1/4" holes in the bottom of the drawers. I can put a piece of cardboard over the slots to keep the worms in the bin until they are ready to migrate to the next bin. The clear front and back of the drawers will be lined with cardboard as well to keep light out. If it works like I envision then the worms will slowly eat the cardboard until it is gone and then they will be able to move down into the new drawer with fresh bedding and food.
I have a small tray to put under the drawers to catch the worm juice that comes out the bottom and I will be able to use that as a fertilizer. When I have things in full production the top drawer will have finished compost that I can just reach in and use while the lower drawer is in progress. This combination of worm tea fertilizer and vermiculture compost should have a very positive effect on my plants and allow me to send less waste to the landfill.
 |
| Friendly Worm Guy |
The running total spent is still around $10 and with my soil coupon I believe I can start my first round of vegetables for under $20. I think my first round of indoor veges will take more time and effort but a comparable amount of expense to those I would buy in the store. The subsequent rounds will start to cost me less as I get everything set up.
More good sites I found to read on composting with worms:
Pure Green Living
Sierra Worm Compost
Vermidragon
Thursday, May 24, 2012
Parsley Joins the Party

My basil is looking great, like a little green bush sitting on top of the soil. I can't wait to transplant it in a few weeks! I imagine my chives will be ready at the same time too and if I'm lucky my compost pile will be ready shortly after. I still water every other day but that will probably change by the end of this week.
I estimate I will need around $5 for a small bag of basic soil and that I will need it in roughly 1-2 weeks. When I buy soil I don't look for fancy stuff with this and that added. I look for something that is "well-drained" or has a low content of vermiculite (the tiny white pebbles) already in it. Well drained soil is important as it helps prevent the plants from damping off if you over water. I know I will have to water more often at the start than I will once my compost is being added. The compost will not only add vital nutrients for the plants but will improve the soil structure allowing it to hold more water without smothering the roots of the plants.
I bought my worm bin yesterday too and will write a separate blog later on how I am preparing it for my worms. As the sign at the thrift store said, "Put the earth first and buy second." Not only did I save money buying a pre-loved container but I saved that much space in the landfill too!
The running total for my garden supplies so far:
$4.07 for seeds and starter soil
$6.41 (with tax) for a worm bin
= $10.48
Wednesday, May 23, 2012
All Topsy Turvey
I had a minor set back this morning. Before I could water my miniature plastic greenhouse and set it back in the window my son got his hands on it. He quickly did a lap around my living room with my husband and I chasing him and then dropped it on the carpet. Soil and tiny Terra Cotta pots went rolling everywhere and all I could do was fall to my knees and try not to cry.
One of the hazards of living in a small space is that I have no space. My desk is within my sons reach so I either balance everything precariously on a high shelf or push it so far back on the desk it takes him an extra second to get it. Neither method works very well and it often irritates me to no end that I have no place of my own that is safe to plop my treasures. I constantly battle negative feelings as I watch my beloved creations get ruined and it seems like I'm the only one that sees anything wrong with it. My son is still to young to understand which is probably half the reason I can move on. Once I have all my seeds started and arranged in my grow room it should be easier since he won't be able to get to it.
After I got over seeing my little sprouts laying helplessly on the floor I started scooping the soil back into pots and gently patting things back into place. The damage to my plants that have sprouted seems minimal but I am waiting a few days before I will think everything is back in order. I have one Parsley that I noticed had sprouted but as it's the only one I am now worried that some of the unsprouted seeds may have gotten picked up with the soil that fell out and placed in the pots with my Basil and Chives. As a perfectionist I find it incredibly frustrating to think about my plants getting mixed up in pots together. I don't think it would affect the plants in any way but it would make me pissy every time I looked at it. I guess if that does happen I'll just have to start over or learn to deal with it.
Lesson of the day: keep toddlers away from freshly sprouted seeds.
Goal of the day: clear a space for my things so I can feel better.
Monday, May 21, 2012
Decisions Decisions
Choosing the Right Plants
Today is day 8 of my Urban Garden Project. The herbs I started are popping out of the soil more each day. I'm still waiting on my Parsley to sprout but that doesn't surprise me as it is known for being slow to start. My basil has begun to stretch taller and looks like it already wants to add more leaves. The chive sprouts are more than just a green spec at soil level now and have since split into thin segments that remind me of grass. I've been watering things every other day so that the roots won't get too wet and rot. Damping off, as it's called, is a common reason indoor plants die.
As my garden progresses I find myself thinking more about what else I will plant. What do I want to cook with in 2-3 months? I must take into consideration things like root space, sun and temperature requirements, production time, and any other specific needs a type of vegetable would need. For this info I look to Google. (The chart at the very bottom of this page is useful.)
From reading materials and knowing what I like to cook with I have compiled a list that I will keep in mind when I go to acquire seeds. This list has already been narrowed down to what I think will work with partial sun, small space, and won't be hard to maintain.
 |
| Picture used from here |
~ Onions
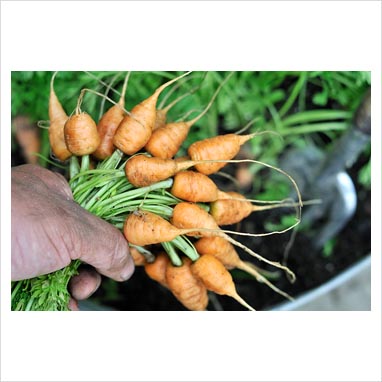
~ Carrots
~ Cherry Tomatoes
~ Spinach
~ Herbs
~ Lettuce/Kale
Each of these plants I will research individually at this point to see what to look for when buying seeds. On my tiny budget it's very important that I choose plants that will give me the best chance to succeed. I am particularly excited to try my hand at strawberries. They are one of my favorites and I've never grown them before. From my readings I've determined that an Everbearing variety would be my first pick since they tend to do the best in containers. One of the biggest challenges of growing strawberries is birds. They love to pick them before humans get the chance. Growing them indoors will prevent this and hopefully greatly increase the amount I get to eat!
Spinach and Lettuce are quick producers that I can continually harvest as needed for several weeks until the plant tires out. After a few weeks of continual production the nutritional content of these will start to decline as well as the taste. These are crops I will need to continually plant every 3-4 weeks to have new ones ready to go.
Carrots are said to do well in containers and with partial sun so I plan to have these closer to the ground in my grow room. The windows are high in the room so any plants that need more light will be hung higher. Anything I plan to harvest regularly I will also keep within arms reach to make it easier on me and encourage the maximum usage of my fresh produce.
The actual varieties I will use will depend on what is available at the store as well as what the packet says the variety needs. Some types will do better in containers than others such as the small tomatoes will commonly do better than the beefy varieties that are known for producing large fruits. I believe that the basic types of plants I have chosen to start with will encourage success and help me get into the routine of constantly sowing seeds. Once I feel comfortable with the amount I am growing I will be able to decide what else I would like to add without fear of overburdening myself. I want to avoid waste if at all possible which I can help to prevent by starting off slow despite the fact that I am extremely excited to have fresh from home produce.
I also decide today that should I need a quick and easy addition to a salad fresh sprouts would be a great option. There are many different types and they all produce quickly for consumption. Sprouts also have very high nutritional value for such a small package. I am still looking at ways to grow potatoes in a small area. I haven't found anything yet but I am confident I will.
 |
| Kale is in the cabbage family and works great for cooking! |
Saturday, May 19, 2012


Subscribe to:
Posts (Atom)